Search This Blog

Saturday, July 26, 2014

Kids Clothes Week Finale

The third installment in my Kids Clothes week is another outfit I made for my daughter using the same MADE pants pattern with pockets, and a blouse from Sew What You Love. I had a great time sewing for my daughter this week. It included such impromptu things as "new gnome slippers" because we lost one of her pointy slippers I made her a year ago. I don't blog about everything I make for her, it would certainly take a great deal of time for me to write about and photograph everything. I enjoyed the chance to take the time to take photos and appreciate my own handiwork. Thanks for stopping by! I look forward to next year's edition of Kids Clothes Week.


Tuesday, July 22, 2014

Kids Clothes Week Part II

Today, as part of Kids Clothes Week, I decided to give the Elegance & Elephants Fedora a whirl. I received this pattern as part of a bundle, and I couldn't wait to try it. I love making hats for my daughter and this fedora pattern posed a couple of new methods and challenges for me. I have never sewn a hat that uses a twill tape method for binding the inner seam. I will likely make this pattern again in the future with different fabrics.

Check out E&E, the patterns are great. My favorite are the bubble shorts, which I will be making in the sailor style later this week!

Monday, July 21, 2014

Kids Clothes Week - School Clothes!

What great timing for Kids Clothes Week 2014! I am making all of my pre-schooler's clothes this year. The school year starts in September, and I bought a wonderful array of apparel fabric at Island Fabric and Sewing Center this year. The entire collection is based on Tula Pink's Voile with ladybugs. I have had a lot of fun so far and I can't wait to kick off Kids Clothes Week with my first installment in the series. The premise is to sew for your children an hour a day, for an entire week. I should be able to do that easily! And without further ado, here is the Lila Blouse from Sew What you Love by Tanya Whelan.  The pants pattern are flat front Kid's Pants with pockets by MADE. The coordinating headband is self-drafted.


What a fashionable toddler! Come back tomorrow to see what else I have whipped up for her new school year!

Saturday, April 12, 2014

Easter Toddler Bonnet for Kid's Clothes Week

This is my second project for Kid's Clothes Week, a bonnet I saw on the popular blog, Sew Mama Sew. The bonnet is originally by Martha Pullen, you can read more about her and the bonnet featured in the Sew Mama Sew article. They provide 2 sizes for the free tutorial, but I needed one for my toddler. I decided to wing it and after measuring my toddler's head in both directions, I decided to cut my rectangles 16 x 11. I kept the chin ties the same size. She has a 20" head circumference. It turned out great! I had to modify one of the last steps since I was not using bias trim. I had to fold the raw edges in and press before topstitching the long front edge closed.

Overall, I loved this pattern. It is cute and super easy. It pulls together quickly and with great results. It is much faster than the previous bonnet pattern I had been using with a separate pattern piece for the brim. I hope to make this bonnet again in a coordinating fabric for her Easter dress.


Tuesday, April 8, 2014

DIY Princess Anna Hat for Kid's Week

Well I am jumping into Kid's Clothes Week a day late, I was sick all day on Monday. I am taking this week to focus on play clothing projects for my daughter, who has all the clothes she needs. Without any prompting this morning as she was rifling through her hat box by the door, (yeah she has a box just for hats) she told me she needed a "Frozen" hat.

So, I did some searches and found a couple of Princess Anna hats people have made, but none of them were what I really wanted. I always try to use up fabric that I already have before running out to buy more and I already had some purple and white fleece. The idea of Kids Clothes Week is to sew for your children for an hour a day and this project seemed perfect, even more so because my daughter suggested it.

I drafted outer pieces based on images of Princess Anna in her hat and lining pieces about an inch longer at the face framing side so that the white would show when I turned the hat. I added a pretty leftover purple trim around the hat. I ended up unhappy with the way the pointy ear flaps stick outward and look silly so I added a chin strap after I completed the hat. I would take this into account in future revisions of the hat.

There is also elastic inserted in the bottom of the back of the hat to help bring it in and shape properly around the head.


Tuesday, April 1, 2014

Little Explorer Toddler Vest with Babar Lining and Gusset Pockets

I am so excited about the sew-along on Alida Makes! It's called "Calling All Kids". It starts on April 7th, 2014. The theme is non-gender conforming clothing for children. I love this theme. It really is a challenge to find girl's clothing that isn't pink and glittery. That's one of the best things about sewing your own children's clothing, you are in charge from start to finish.

I decided to make something that has been on my radar for quite a while. I had some new fabric featuring Babar and I have always wanted to make the Little Explorer vest from Little Things To Sew by Oliver + S. I decided to make it happen in conjunction with this sew-along.

I am really lucky to have such a great place to explore right in my own backyard. I live on Whidbey Island and we have beach access behind my house where we happened upon some daffodils in the field. It was the perfect setting to show off this cute outfit.

The little explorer spies a patch of daffodils.

Maybe just one?

Okay maybe four...

We must continue the journey.

For more!

Off on another adventure...

Wednesday, February 26, 2014

Free Reverse Applique Heart Tutorial

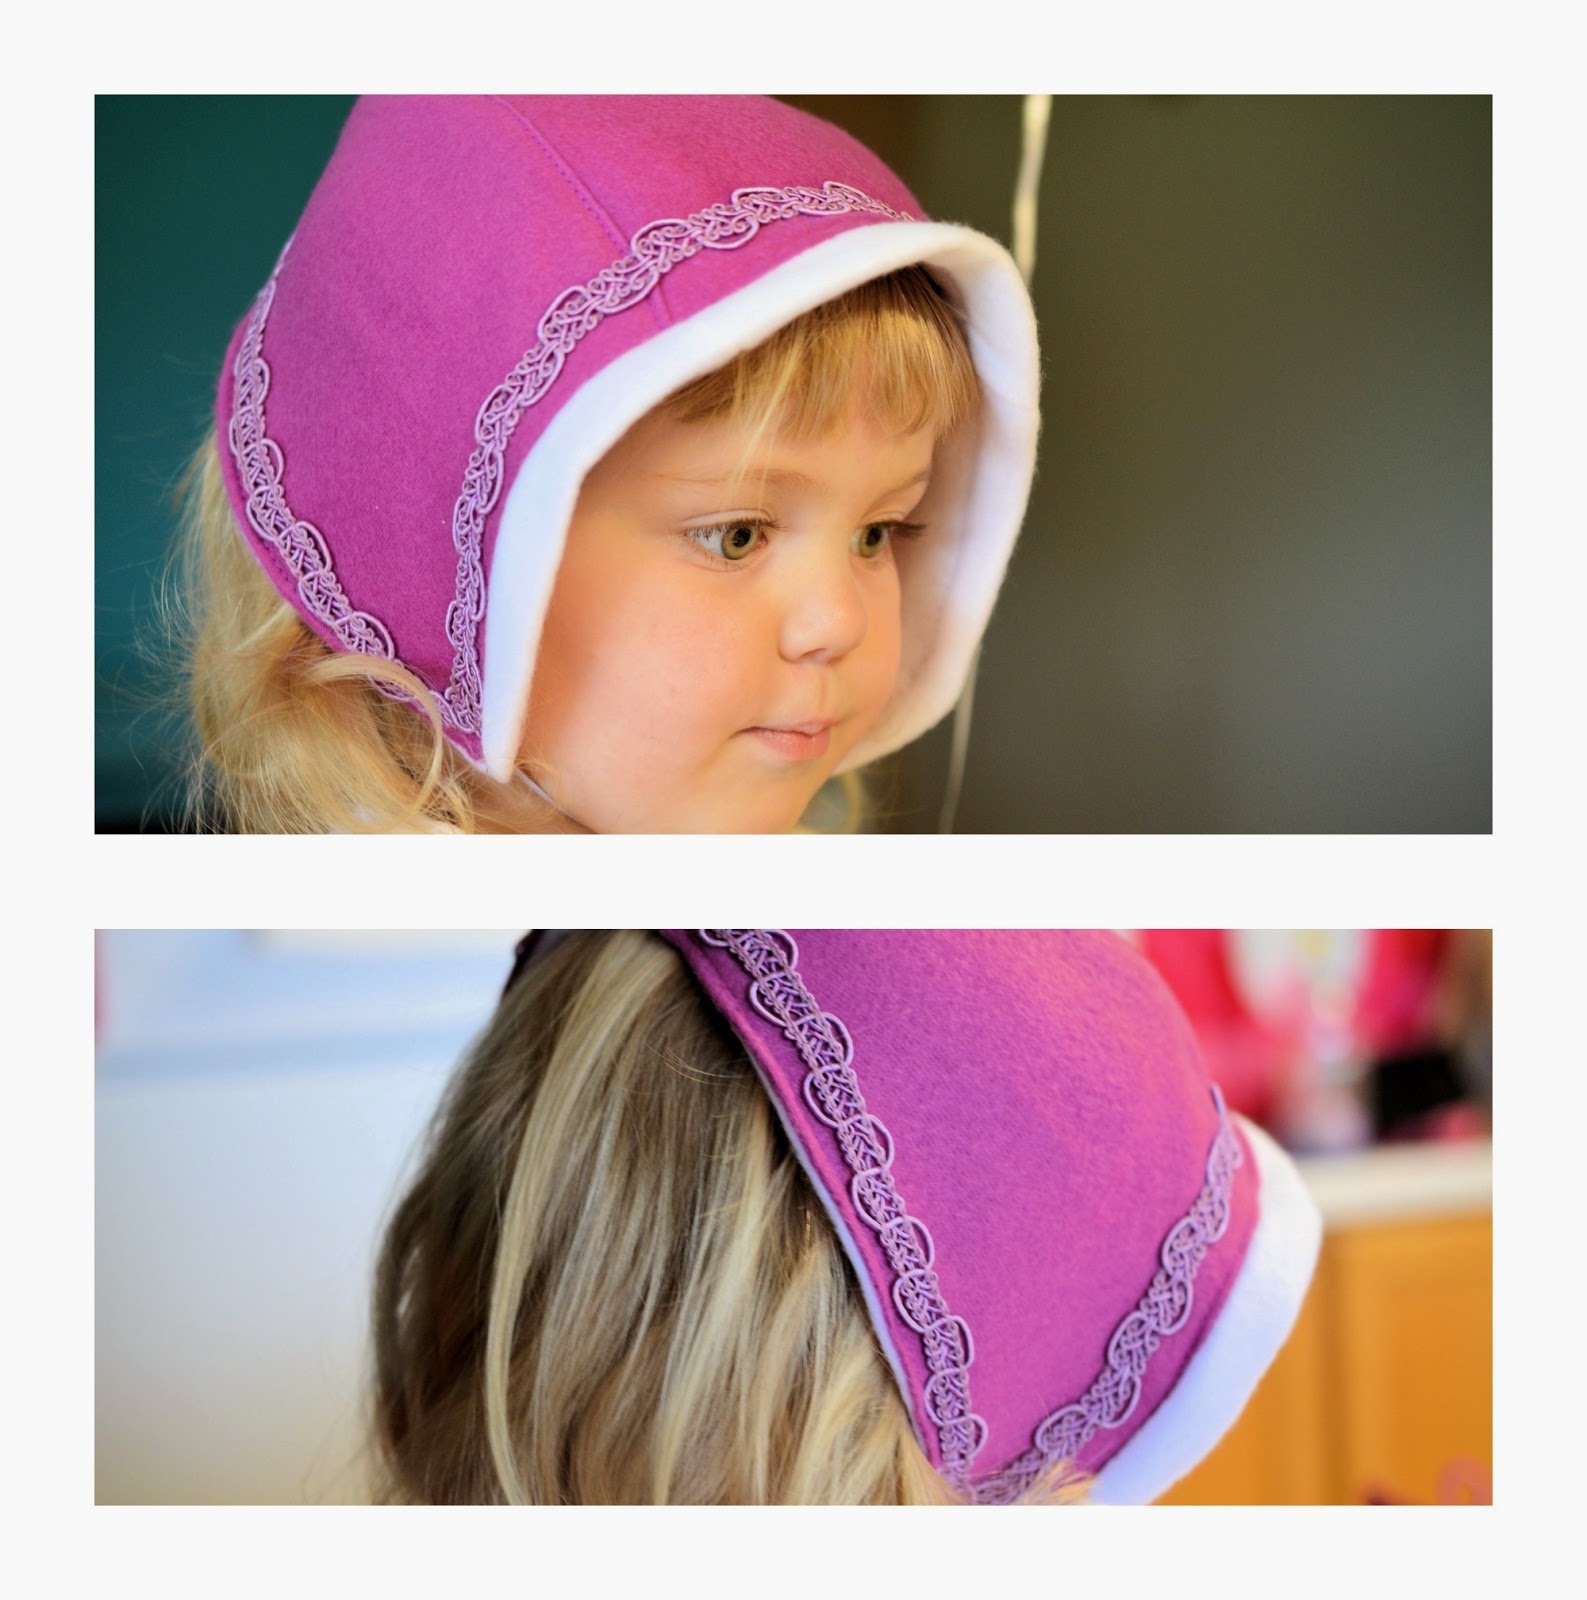
I have been in a bonnet making frenzy this week and wanted to add something special to a plain canvas outer fabric by adding a reverse heart applique design. I will show you step-by-step how easy it is to incorporate a reverse applique heart into your designs.

I wanted to add the applique to the side of a bonnet so when I made my heart template I made sure there would be at least half an inch on either side of the finished applique so that it would not get caught in my 1/4 inch seam allowance when making the actual bonnet. You will want to take this consideration when making your heart template.


1. Here are my two hearts, they will be sewn onto the main body of the bonnet on the center of one side. I cut them so that the width did not exceed the width of the body piece of fabric (seen center).


2. Pin your coordinating fabric heart into the desired location.


3. I used a 1/2" seam allowance around the inside edge of the raw edge of the heart.


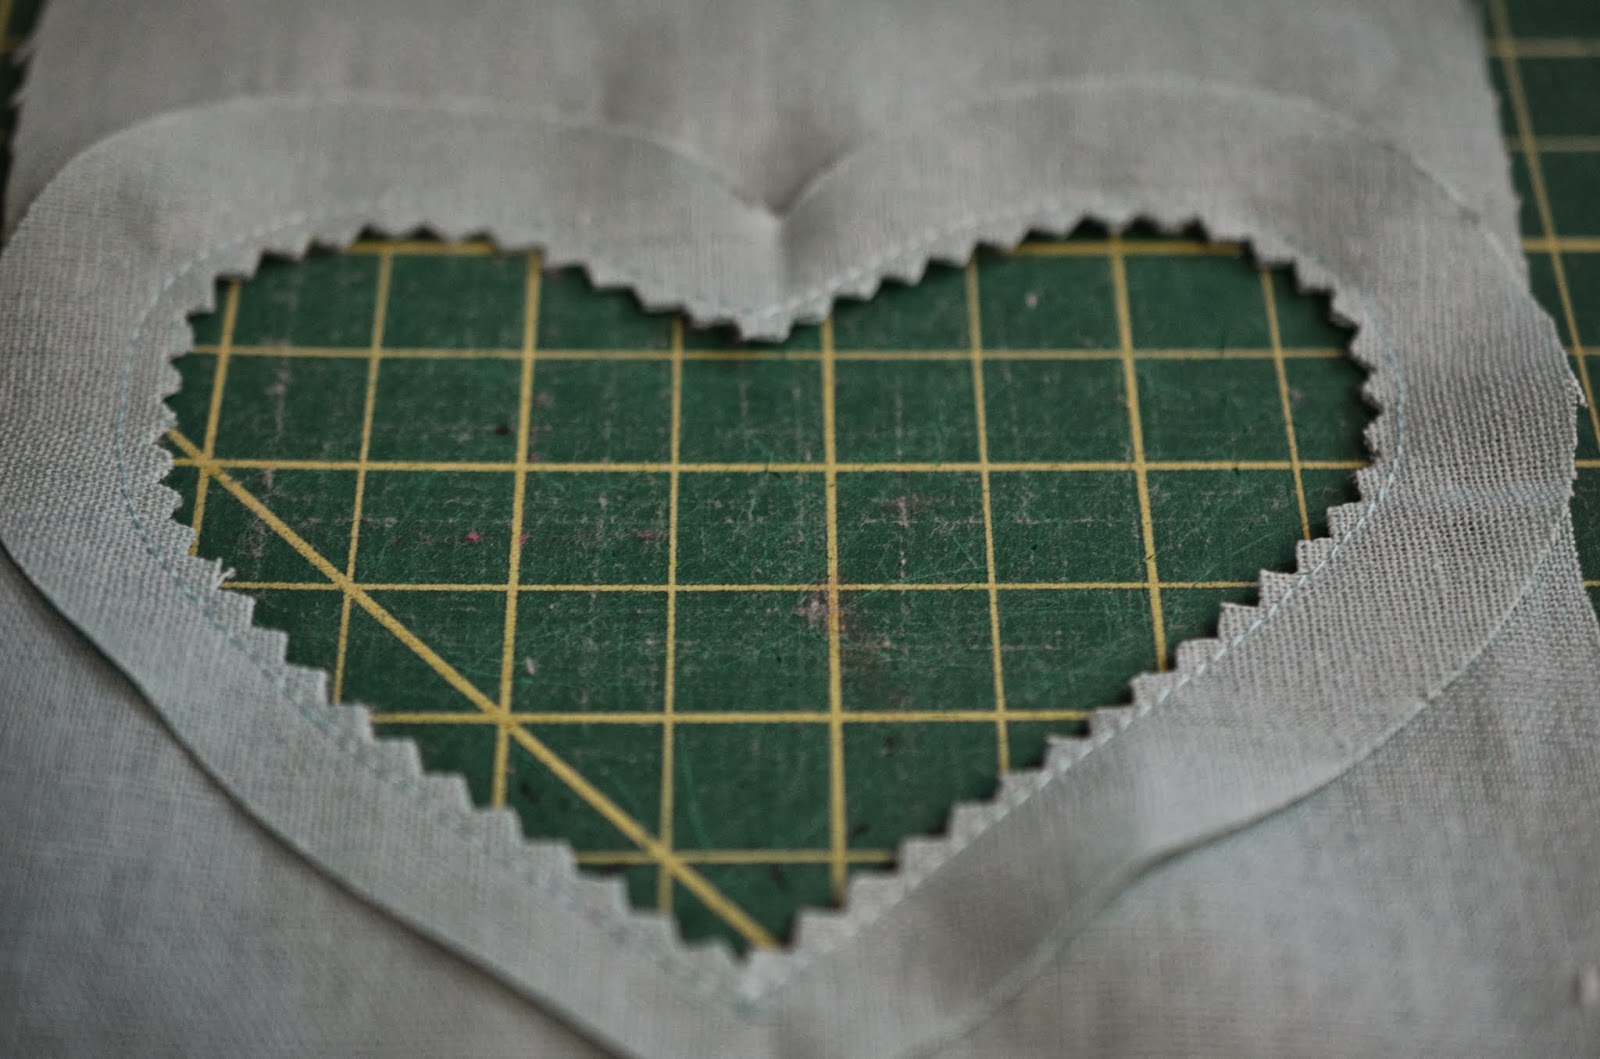
4. Carefully cut around the inside of the heart leaving around 1/8" of fabric, carefully and slowly.


5. I used pinking shears to trim my inside edge, careful not to cut through my seam.


6. After turning your fabric over and preparing to press, clip your fabric at the inside point of the top of the heart.


7. Carefully press your fabric to the other side, take care around the curves.


8. View of the right side of the fabric after pressing.


9. Lay your contrasting fabric heart underneath your main fabric piece.


10. Pin. Go nuts!


11. Topstitch all the way around and trim any excess.
12. Continue with your project using your heart applique pattern piece. Voila!